
Blown Easter Eggs
If you give this a try, we'd love for you to share a photo so we can see your kids enjoying the creative process!
I first encountered hollow Easter eggs a decade or so ago. I remember trying to make some with my cousin shortly after that. We used a needle to make the holes and nearly passed out after clearing out one or two eggs. So when my kids recently overheard a family member talking about hollow Easter eggs and said they wanted to try it out, I was a little apprehensive. We gave it a try and it turned out to be fairly simple and a lot of fun! Plus, it’s nice knowing that I don’t have to worry about finding a forgotten egg somewhere outside or in the house months down the road :) Here are a few things that made it a little easier for us:
Blown Egg Tips

Nails work great and size makes all the difference! We used nails because they are easy to gently hammer through the eggshell and they work well for breaking up the contents (we just gently moved the nail around to puncture the yolk so it comes out more easily). I found that a small difference in nail circumference makes a big difference in the ease of blowing out the contents. We used the smaller nail initially, but the boys weren’t able to really do it because the hole size made it too difficult for them. It was also quite cumbersome for me - it took about 3-4 minutes per egg and I was getting light-headed after a few eggs. The slightly thicker nail cracked a couple eggs, but worked really well for the most part! It also allowed my five-year-old to easily empty the egg himself, with each egg only taking a minute or so.

When to blow out the contents I initially wondered if we should empty the eggs before or after decorating them, mainly because I was concerned that my toddler might crack the hollow eggs. The answer is to empty the contents BEFORE decorating! A couple of our eggs got dropped and instead of a goopy mess and devastated toddler, the hollow eggs just got a few minor cracks in them that he didn’t even notice.

Blow vs. Suck Your kids may not need this, but with mine, I realized we should briefly review the difference between sucking and blowing. I’m happy to report that no raw egg was sucked into a little, unsuspecting mouth.
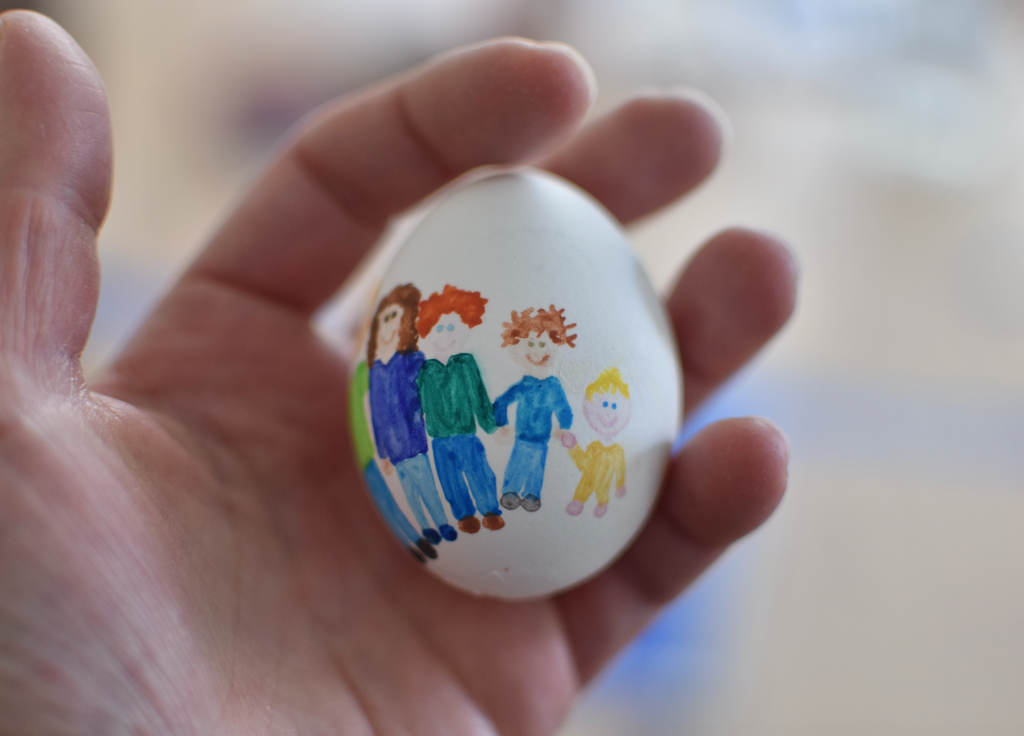
We loved watercolors for decorating You can get really fancy and technical with decorating Easter eggs, but we decided to just use our watercolor sets. There wasn’t any boiling water to worry about or a long process to wait through. It was easy to set up and clean up and the boys loved it!

Use the sink! This one is sort of a no-brainer, but I get so used to doing crafts at our project area that we were initially blowing out the eggs at the craft table. I could feel myself getting tense as more and more raw egg was getting dripped on the table and the ground and then I realized it was ridiculous for us to be hollowing the eggs there! We moved to the sink and it was smooth sailing from there. We also used a little running water to help loosen up the last little remnants in each egg and to rinse it to make sure the shell was clean before blowing on it.
We hope you enjoy this activity or that it helps to inspire other creative experiences for you and your little one(s). If you're doing something at your house this Easter that invites creativity, we'd love to see your creative process in action! Message us on Instagram or tag us with @sprout_kids.